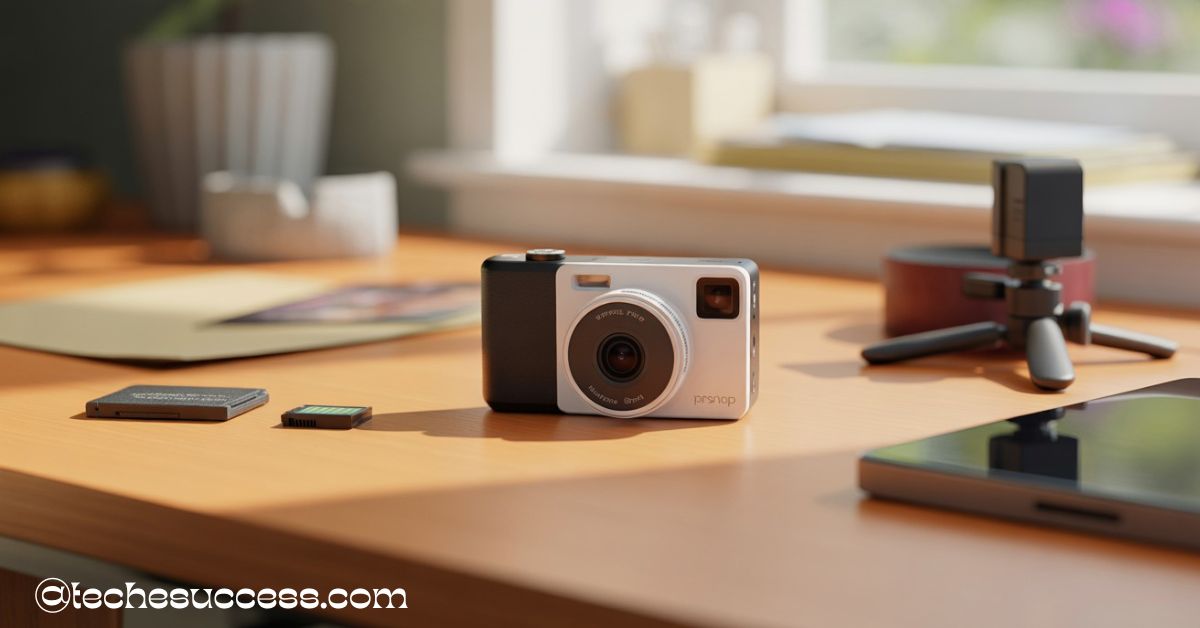
The Kobra 3 Combo Beagle Camera combines smart monitoring with high-resolution time-lapse for seamless 3D printing. With easy setup, mobile app control, and crisp 24MP imaging, it’s a top choice for makers. Stay tuned with us as we explore everything this powerful combo has to offer.
“Stay tuned with us as we explore everything you need to know about the powerful and user-friendly Kobra 3 Combo Beagle Camera…”
Introduction to the Kobra 3 Combo Beagle Camera
In the rapidly evolving world of 3D printing, convenience, automation, and real-time monitoring are becoming essential. Enter the Kobra 3 Combo Beagle Camera, an advanced solution tailored to Anycubic’s latest 3D printer users. This combo setup enhances your printing experience by integrating intelligent features like remote viewing, smart time-lapses, and high-resolution visuals into one sleek package. Whether you’re a hobbyist, professional maker, or content creator, the Kobra 3 Combo Beagle Camera aims to bring seamless functionality to your workflow.
What makes this combo truly special is its plug-and-play nature, user-friendly software, and hardware-level upgrades that provide better insights into your print jobs. If you’re looking to monitor, record, or share your prints without physically being present at your printer, the Beagle Camera inside this combo offers all the tools you need.
In this article, we’ll dive deep into every aspect of the Kobra 3 Combo Beagle Camera — from installation and performance to user reviews and pricing — so you can make an informed decision before investing.
Kobra 3 Combo Beagle Camera Review: First Impressions & Key Features
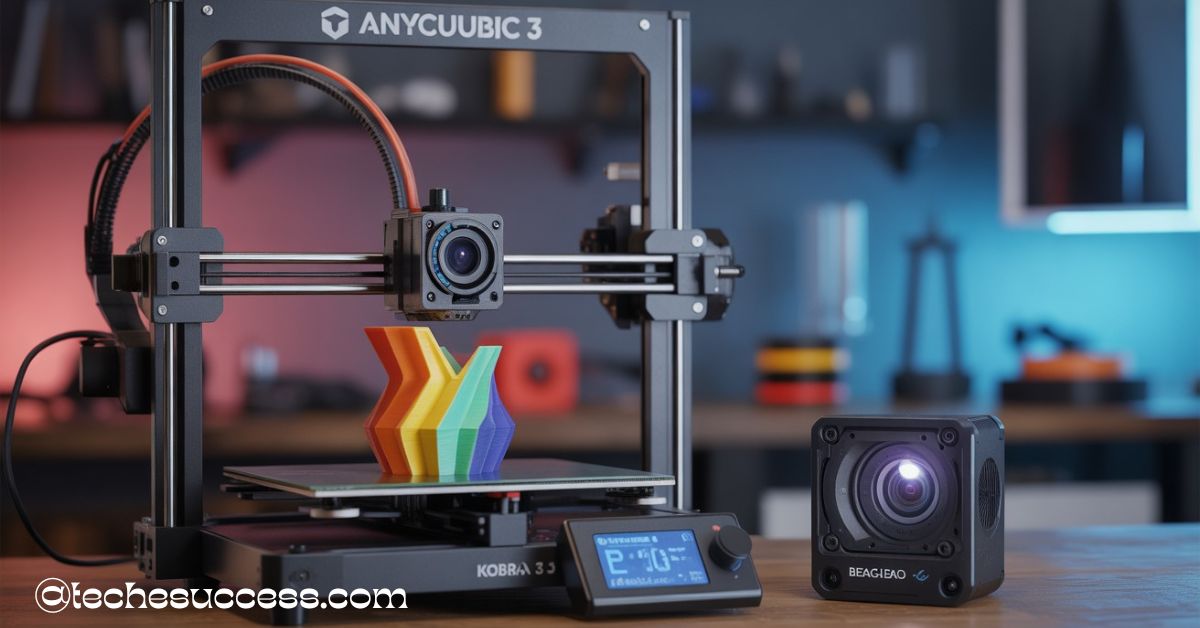
The first thing you notice when unboxing the Kobra 3 Combo Beagle Camera is its quality packaging and compact design. The kit includes the Anycubic Kobra 3 printer, the Beagle Camera, mounting accessories, and a quick-start guide. Right out of the box, the camera feels solid, well-built, and ready for integration.
The camera’s most talked-about feature is its 24MP image sensor, which delivers crisp images and time-lapses with vibrant colors and low noise. It’s compatible with the Kobra 3’s multicolor printing and works seamlessly with the Anycubic app. Moreover, the Beagle Camera is equipped with onboard processing, so it handles time-lapse creation without burdening your printer or computer.
Another standout feature is the smart remote monitoring via Wi-Fi. Users can connect the Beagle Camera to the app and track their print status in real time, pause jobs, or even capture videos of their creations. Compared to many aftermarket options, the camera’s integration with the Kobra 3 Combo makes it more reliable and precise.
From initial impressions, it’s evident that this combo is designed with user convenience and high performance in mind, offering features that go beyond aesthetics and into practical value.
How to Install the Anycubic Kobra 3 Camera
Installing the Beagle Camera on the Anycubic Kobra 3 is a straightforward process, even for beginners. The package includes a 3D-printable bracket file, which you can print using the Kobra 3 itself before installation. Once printed, the camera mount attaches to the printer’s X-axis using the provided screws.
Start by securely attaching the bracket, ensuring that it aligns with the extruder head for optimal viewing angles. Next, connect the Beagle Camera to the left USB port on the printer. This port supports data transfer and allows full control via the Anycubic app.
Once connected, power on your printer and camera. The indicator LED on the Beagle Camera should light up, confirming power and connectivity. You can then use the app to verify the camera feed and make final adjustments to the angle. A firmware update may be required on your printer or camera, which the app will guide you through.
This seamless process underscores how thoughtfully the camera has been designed for Anycubic’s ecosystem. You don’t need extensive technical skills—just follow the manual or app instructions to get started.
Kobra 3 Combo Beagle Camera Mount Guide
A crucial aspect of the Kobra 3 Combo Beagle Camera setup is the mounting process, which determines how well the camera captures the printing action. Anycubic provides a downloadable STL file for a customizable mount, giving users the flexibility to print a frame that best suits their workspace.
The default mount is designed to be lightweight yet sturdy, positioning the camera at a fixed angle to capture the extruder and print bed clearly. The placement ensures that users can monitor fine details during printing, which is essential for creating effective time-lapses and identifying print failures early.
During installation, make sure the camera doesn’t obstruct the print path or interfere with moving components. Tighten all screws securely and check cable slack to prevent accidental unplugging during long print sessions. With proper installation, the Beagle Camera remains stable and provides a consistent viewing angle.
While the default mount works for most users, advanced users often customize the bracket to suit specific needs like enclosure mounts or overhead perspectives. This flexibility makes the mounting process one of the camera’s strengths.
Understanding the Kobra 3 Combo Beagle Camera Manual
The Kobra 3 Combo Beagle Camera manual offers clear, step-by-step instructions for setting up and using the device. It’s ideal for users of all experience levels, whether you’re a beginner trying out your first smart camera or an expert looking to fine-tune the settings.
The manual begins with installation guidance, including bracket printing, USB port usage, and app connectivity. It also provides troubleshooting advice for issues like camera disconnection, poor video quality, or firmware update errors. A special section explains how to enable time-lapse recording and configure advanced settings like resolution and frame rate.
Another valuable part of the manual is the camera placement guide, which helps users understand optimal angles for different print types. It even includes QR codes linking to video tutorials for visual learners. The language used is simple, with diagrams and visual aids that ensure clarity.
Overall, the manual enhances user confidence by making setup and customization easy to follow.
Using the Kobra 3 Combo Beagle Camera App for Real-Time Monitoring
The companion Beagle Camera app elevates the Kobra 3 Combo’s usability by enabling real-time monitoring, control, and recording—all from your smartphone. Compatible with both Android and iOS, the app syncs with the camera via Wi-Fi, allowing you to check your print job from anywhere.
Once paired, the app’s dashboard shows a live feed of your print, complete with temperature stats and print progress. Users can start/stop prints, adjust settings, and view time-lapse captures. Push notifications alert you to print completion or errors, providing peace of mind during long print sessions.
The app also offers cloud storage for saving time-lapses, as well as sharing options for social media or customer portfolios. Its intuitive UI ensures that even first-time users can navigate features effortlessly. One standout tool is the LED control option, which lets you turn the camera’s light on/off to enhance visibility depending on your workspace lighting.
For users looking to minimize downtime and maximize control, the app adds substantial value to the Kobra 3 Combo Beagle Camera experience.
Kobra 3 Combo Camera Performance: Resolution, Lighting, and Audio
Performance is where the Kobra 3 Combo Beagle Camera truly shines. With a 24-megapixel sensor, the camera captures ultra-clear images and videos, ideal for time-lapse creation or inspecting detailed prints. Unlike many basic webcams, this camera provides professional-level clarity, even under varying lighting conditions.
The adjustable LED lighting enhances visibility on dark or shadowed prints. This is especially helpful in enclosed environments or dimly lit workspaces. Users can adjust brightness settings through the app or manually via preset configurations.
Audio support is also integrated, allowing users to capture ambient sounds during the print process. While not essential for everyone, this feature is useful for diagnostics or content creators who wish to document the full sensory experience of 3D printing.
The camera’s frame rate is consistent, offering smooth playback of live footage and time-lapses without stutter or lag. These performance features make it one of the most complete 3D printer camera options currently available.
DIY Customization with 3D-Printed Camera Brackets
One of the Kobra 3 Combo Beagle Camera’s most popular features is the ability to customize its mounting bracket through 3D printing. Users can modify the default design to accommodate specific angles, enclosure placements, or aesthetic preferences.
Many online communities have already shared STL files for creative bracket designs—ranging from adjustable arms to magnetic mounts. This open approach allows you to truly make your setup unique. If you need a ceiling-mounted view or want to place the camera at the back of the printer, you can design a bracket to match.
The Beagle Camera’s compact form makes it adaptable to almost any configuration. Plus, the bracket customization process teaches beginners more about 3D modeling and print tolerances. This DIY aspect adds value by extending the product’s versatility far beyond the out-of-box experience.
Compatibility with Kobra 2, Kobra 3, and Klipper Systems
While optimized for the Anycubic Kobra 3, the Beagle Camera is also compatible with the Kobra 2 and Klipper-enabled printers. This cross-compatibility ensures users aren’t locked into a single printer model.
Using the camera with the Kobra 2 requires a slightly different mounting configuration, but the setup process remains similar. Klipper users will benefit from the camera’s advanced features like time-lapse slicing and remote access. Integration with OctoPrint or Fluidd is also possible through firmware extensions.
This flexibility makes the Beagle Camera a solid investment, especially for users who plan to upgrade or change printers. Anycubic’s consistent software support across devices ensures that compatibility isn’t just a feature—it’s a long-term commitment to user satisfaction.
Kobra 3 Combo Beagle Camera Price & Bundle Breakdown
The Kobra 3 Combo Beagle Camera price varies depending on region and seller, but typically ranges between $429 to $499. This includes the printer, camera, accessories, and bundled software.
When purchased separately, the Beagle Camera alone is priced around $39 to $59, making the combo bundle a cost-effective solution. The bundle often includes extra perks such as an enclosure, multicolor filament pack, and a dedicated Intelli-Box for dry filament storage.
Here’s a quick comparison:
| Product | Included | Approx. Price |
| Kobra 3 Printer Only | Printer + manual tools | $379–$419 |
| Beagle Camera Alone | Camera + USB + mount | $39–$59 |
| Combo Bundle | Printer + Camera + App + Add-ons | $429–$499 |
The combo not only saves money but also reduces compatibility headaches, making it the best option for most users.
What Reddit Users Are Saying About the Kobra 3 Combo Beagle Camera
A quick scan through Reddit forums like r/3Dprinting and r/Anycubic reveals enthusiastic praise for the Kobra 3 Combo Beagle Camera. Users highlight the ease of setup, high-quality video output, and reliable app performance.
One Redditor commented, “The time-lapse feature alone is worth the investment—it makes my prints look cinematic.” Another noted that the camera helped them catch filament jams early, saving time and material.
Some users mention a learning curve with bracket mounting, especially for enclosed printers, but share that community support and printable mounts made the process easier. Overall, Reddit’s feedback underscores real-world satisfaction and provides insight into practical use cases.
Kobra 3 Combo Camera vs Standalone Beagle Camera: What’s the Difference?
While both products offer powerful features, the Kobra 3 Combo Camera includes tighter integration with the printer, firmware, and app. The standalone Beagle Camera is compatible with a wider range of printers but may lack some of the plug-and-play convenience of the combo.
In the combo, the camera is pre-configured for Anycubic’s ecosystem, eliminating guesswork. Users enjoy faster setup, bundled support, and guaranteed firmware compatibility. On the other hand, standalone users might benefit from greater flexibility but must handle more of the setup and customization manually.
In short:
- Combo = convenience and optimized performance
- Standalone = flexibility and wider printer support
Choose based on your needs, budget, and comfort level with tech setups.
Pros and Cons of the Kobra 3 Combo Beagle Camera
Pros:
- Seamless integration with Anycubic Kobra 3
- 24MP high-resolution camera
- Smart app for remote control and monitoring
- Customizable with 3D-printed mounts
- Affordable when bought as a bundle
Cons:
- Requires bracket printing for mounting
- Left USB port only supports the camera
- App setup may require firmware updates
These pros and cons should help you decide whether the product meets your specific 3D printing needs.
Real User Reviews and Community Feedback
Users across YouTube, Amazon, and online forums praise the Kobra 3 Combo Beagle Camera for its user-friendly setup and reliable performance. Influencers have highlighted the combo’s appeal to both beginners and experienced makers.
Reviewers mention smoother time-lapse creation and better remote print monitoring compared to generic webcam setups. Support from Anycubic also receives positive ratings, especially when it comes to app updates and replacement parts.
This overwhelming support from real users solidifies the product’s standing as one of the best printer-camera combos on the market.
Who Should Buy the Kobra 3 Combo Beagle Camera?
If you’re someone who wants to document your prints, monitor projects remotely, or simply have a smarter setup, the Kobra 3 Combo Beagle Camera is ideal. It’s best suited for:
- 3D printing content creators
- Professionals managing multiple printers
- Beginners looking for an all-in-one solution
Its ease of use, customization potential, and robust performance make it a worthwhile addition to any printing environment.
Conclusion: Is the Kobra 3 Combo Beagle Camera Worth It?
The Kobra 3 Combo Beagle Camera successfully bridges the gap between basic functionality and advanced monitoring. With high-res imaging, smart app controls, and a flexible setup, it delivers on all fronts. Whether you’re a novice or an expert, this camera combo can elevate your 3D printing game.
For the price, the features, and the peace of mind it offers, this combo is a smart investment in your printing future.
Frequently Asked Questions (FAQs)
1. Can I use the Beagle Camera with other 3D printers besides the Kobra 3?
Yes, the Beagle Camera works with other models like Kobra 2 and even Klipper-based setups, though setup steps may vary.
2. Do I need to print the mounting bracket myself?
Yes, the combo includes STL files, and you can customize or use community-shared designs.
3. Does the camera record sound?
Yes, it includes a built-in microphone to capture audio during printing.
4. Is there a subscription required for the app?
No, the Beagle Camera app is free to use, including cloud access for time-lapse storage.
5. How much bandwidth does the live stream require?
A stable Wi-Fi connection is enough; the stream is optimized for minimal data usage.
Also Read: